Week 4 – Enclosing a Magnet
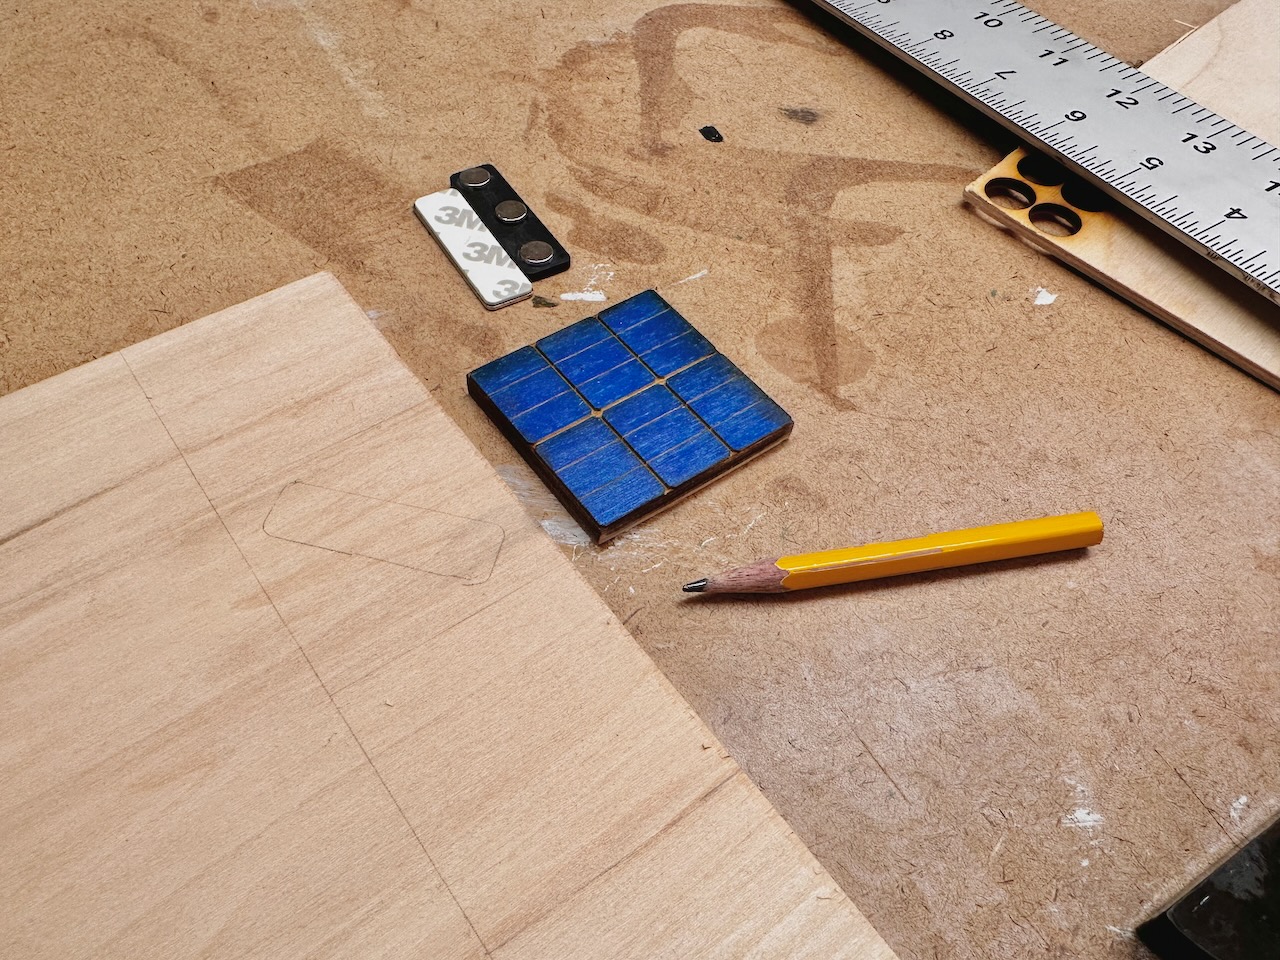
This week, I wanted to mount my extra wooden solar panel from last week on a stand, enclosing a magnet in the base so it could become a piece of a magnetic board game.
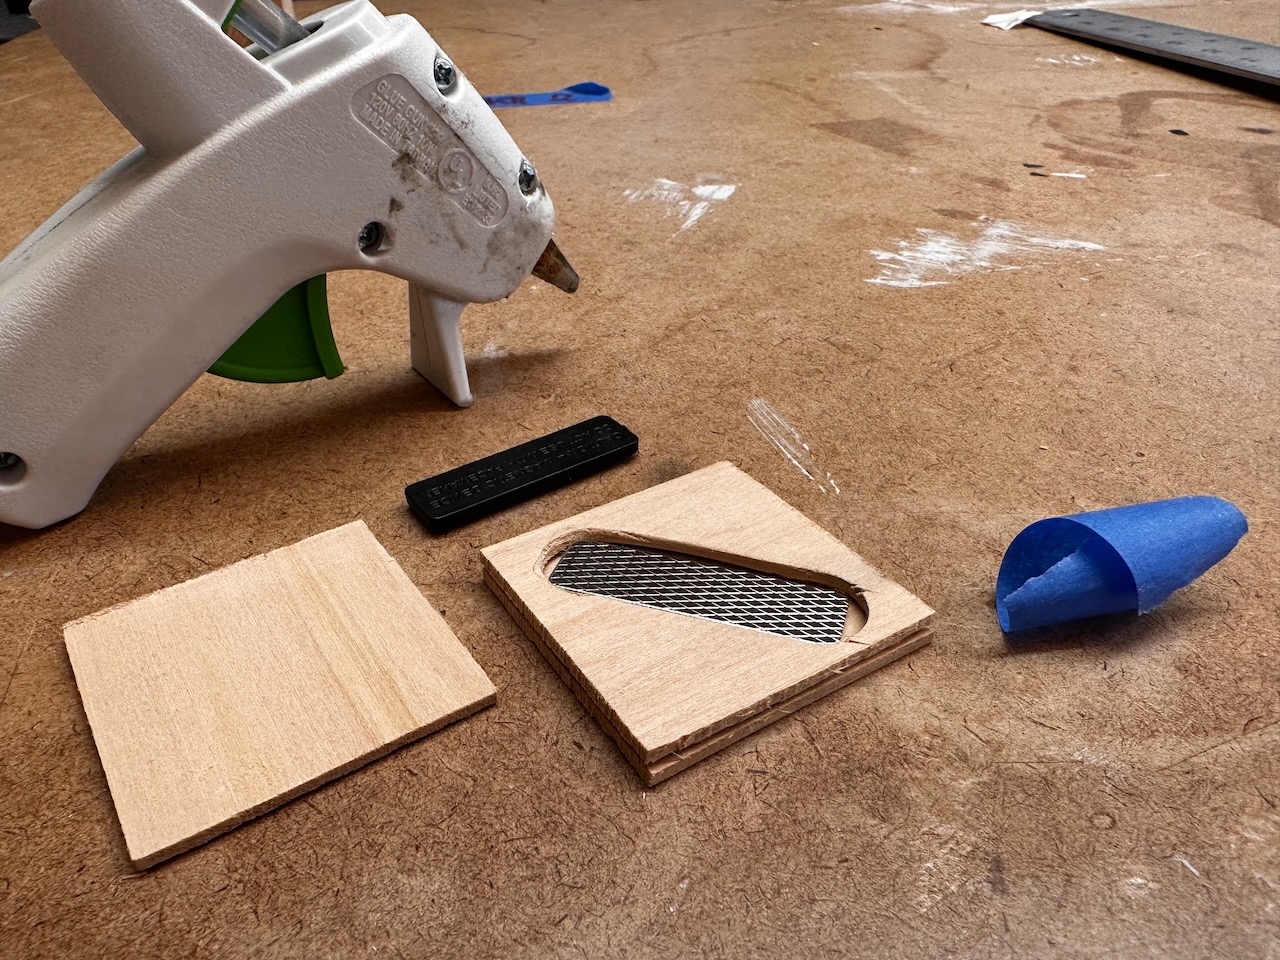
First, I designed my assembly mentally, and sketched it. I traced the solar panel out 3 times onto thin birchwood, then drew the shape of the magnet onto one. I’d cut out the magnet area on the middle layer, then glue the layers together to create the space inside a solid platform.
The band saw cut the outline without issue; I waited to cut into thirds since the larger shape would maintain better structural stability. I’m feeling confident on the band saw, since I’ve been using it for every project.
To clear out the magnet space, I removed 3 full-depth, large, neighboring holes with a Forstner bit on a hand drill (since the drill press had no good mounting option).
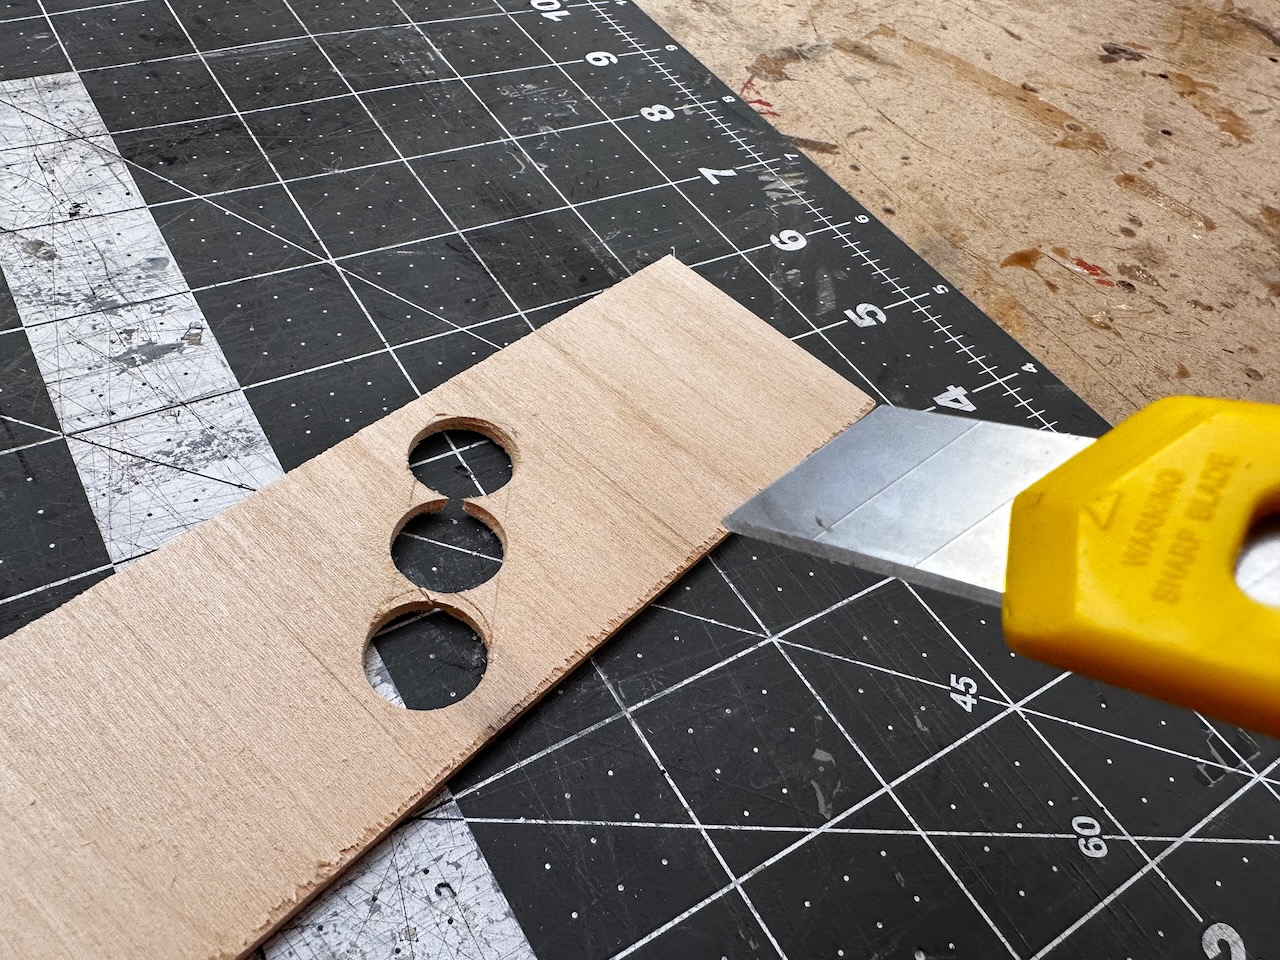
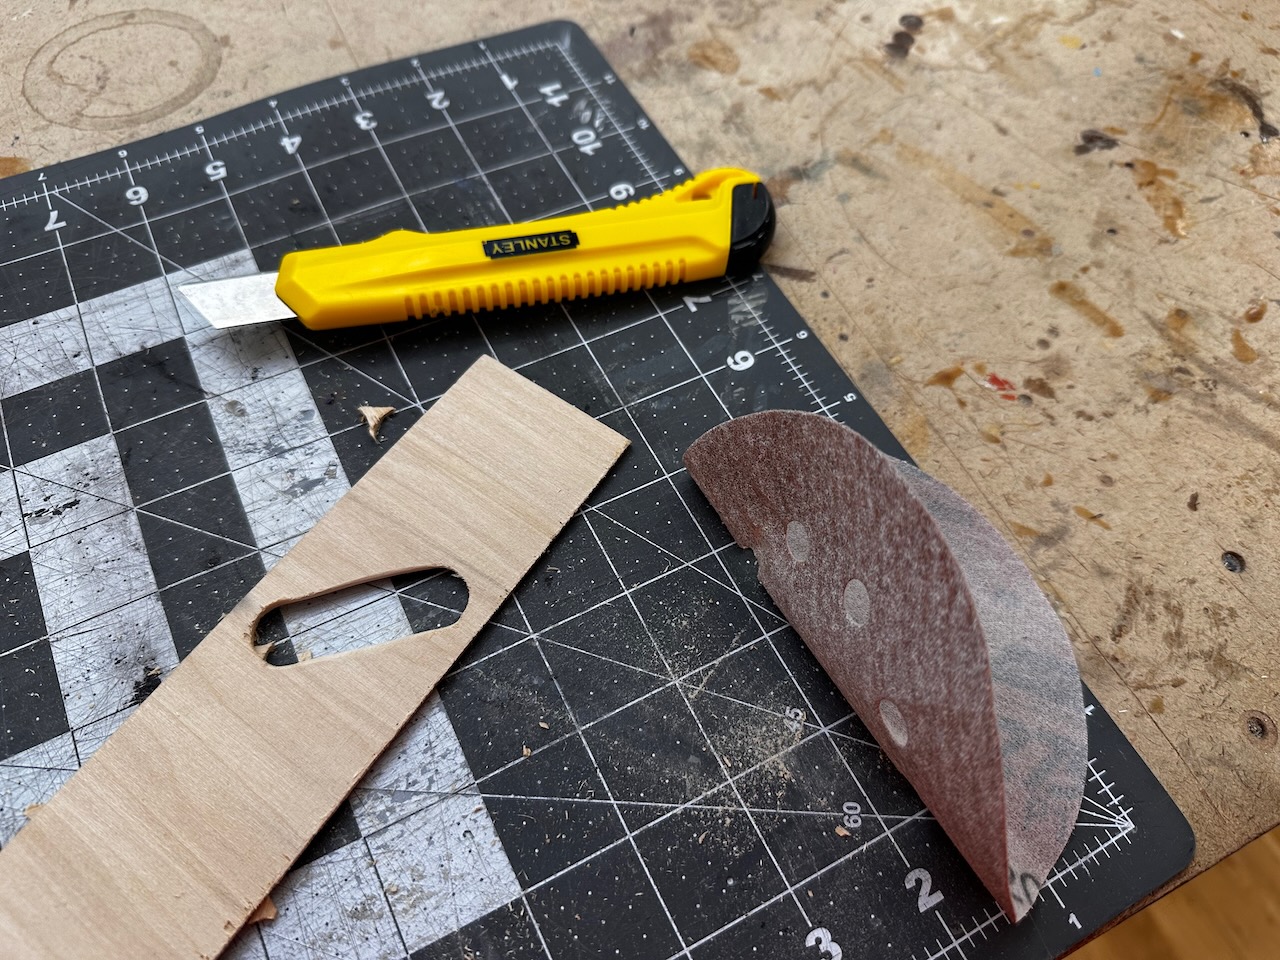
I went to work with an X-acto knife, slicing out the extra wood in between since it wasn’t thick. The shop had no rectangular sand paper to go in a sanding block, so I used a circular pad by hand to sand out the sides for a smooth finish (though this wouldn’t be visible from the outside/finished product).
Heading back to the band saw, I cut the wood into thirds. The magnet fit perfectly inside the slot:
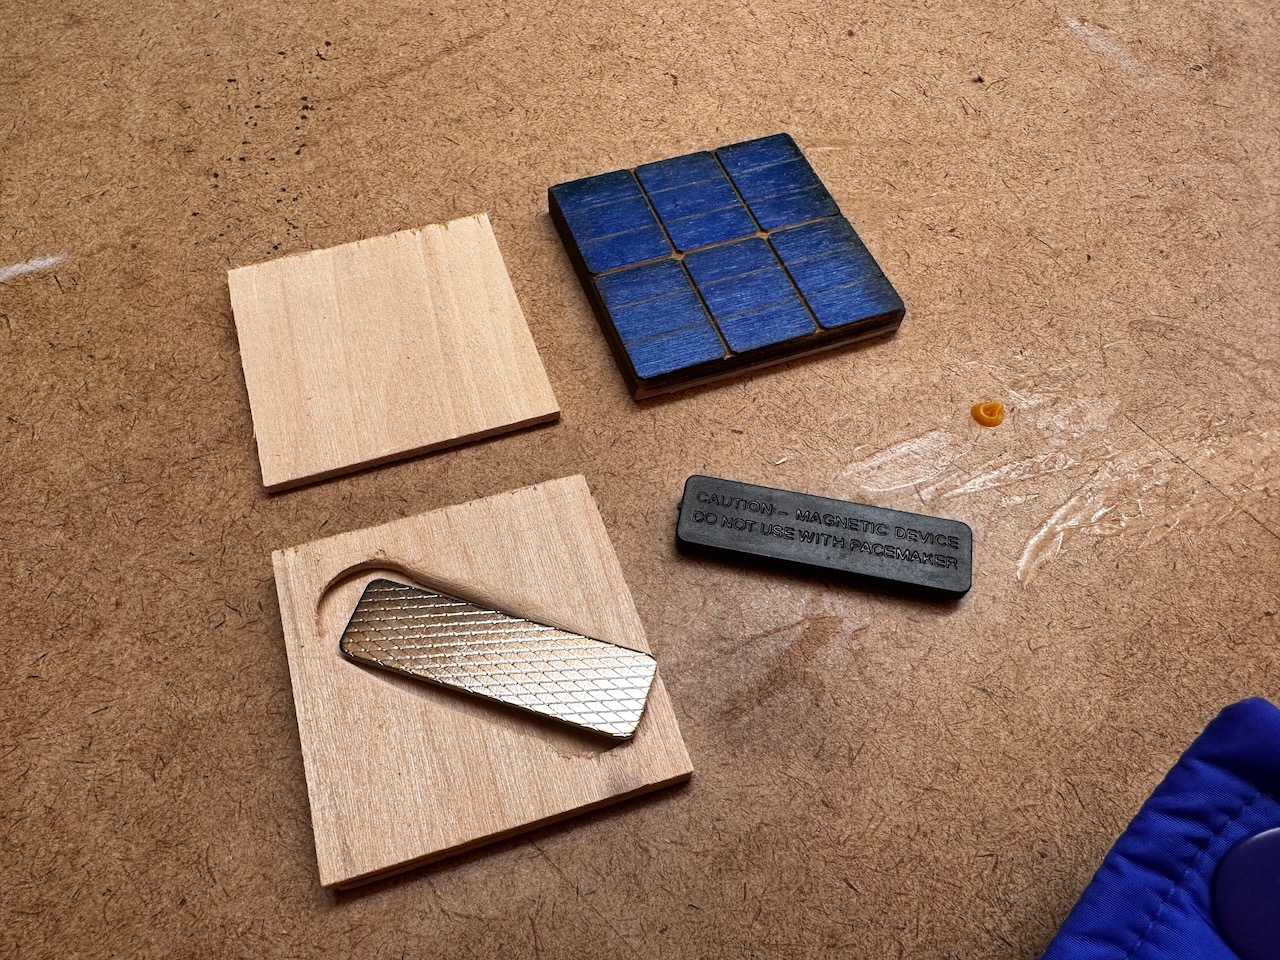
I got to work gluing the layers together. Unfortunately, someone stole the wood glue from the shop, and since I was feeling slightly bad (narrator: was coming down with COVID symptoms), I made do with the hot glue gun. I’d been looking forward to learning to use wood glue, but that’ll come another week. I used tape on one of the layers instead of glue in case I want to remove the magnet.
The other order of business was the mount. I had leftover dowel material from my Blockheads project, and shop staff advised me the miter saw would cut it at an angle. They refreshed me on how to use the miter saw, but we were deeply mistaken, as the miter saw splintered the rod into dozens of shards & sprayed it everywhere. (Eye protection to the rescue!) We tried a manual wood saw, but that was barely cutting, and the knife wouldn’t work at this thickness. I recalled cutting the rods for Blockheads with the band saw, which did the job, using the guard to make equal lengths, then I got the manual sandpaper back out to put a 45º edge on the rods.
To mount the rods, I presumed glue wouldn’t provide enough stability. I measured them, found the appropriate drill bit, then used the hand drill to cut out two spots for them, positioned outside the magnet window, providing the illusion of a continuous platform.
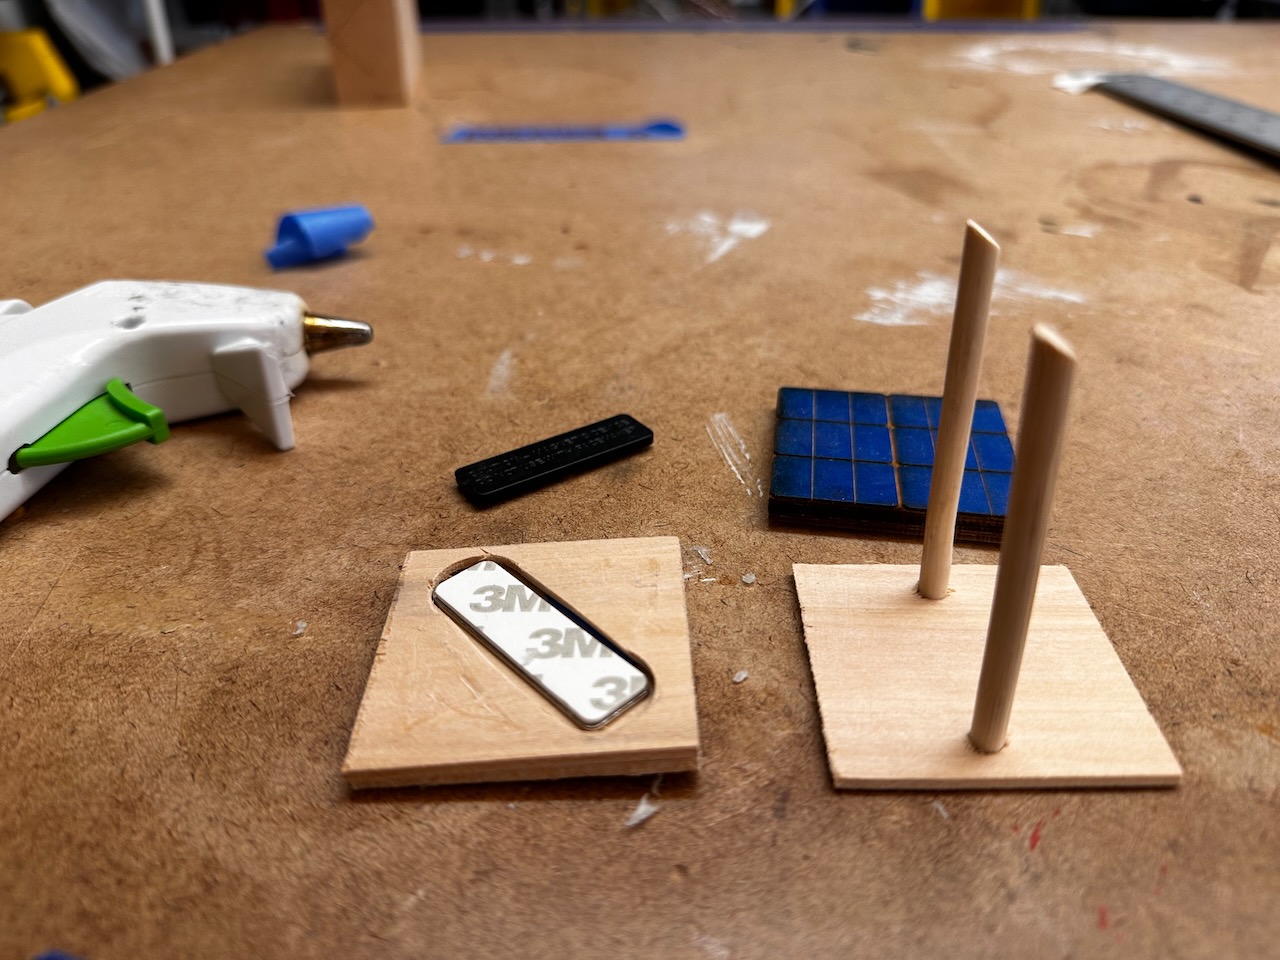
Final dots of hot glue finished the job, and the other magnet jumped to its spot on the bottom of the base! This will allow a board for the game with precisely-positioned magnetic pieces.
