Week 3 – Laser Cutting
Laser cutting allows drastically more precise drawing/cutting than could be achieved by hand. The most precise drawing is data visualization, so I thought I could leverage the qualities of the laser cutter to produce a physical data visualization. One of the most remarkable stories of scaling in the last decade is the cost of solar panels: the price has come down 99% in the last 4 decades, and 84% in just the last decade. I wanted to visualize how large the relative panels one could buy for a given amount of money in 2010 vs 2020.
The project started with research. I tracked down a few essential statistics, including the cost of photovoltaic (PV) modules in 2010 and 2020, and the power density (Watts per area). The former led me to the National Renewable Energy Laboratory’s quarterly reports on solar cost benchmarking, from which I got the essential data: $2.67 per watt in 2010, $0.38 per watt in 2020. I used a general benchmark of 15W/sqft. I got carried away trying to calculate extraneous properties & sizing the panels to various measurements, but a math-studying friend helped me cut scope & simplify my calculations.
2010: $2.67 per watt2020: $0.38 per watt15 watts per 1 sqft$2.67 per watt * 15w per sqft = $40.05/sqft$0.38 per watt * 15w per sqft = $5.70/sqft$40 per sqft = $1 per x sqftx = 1/402010 $1 = 0.024968789 sqft5.7x = 1x = 1/5.72020 $1 = 0.1754385965 sqft// side_length = sqrt areascale_factor = sqrt(0.1754385965/0.024968789)scale_factor = 2.6507198633width_2010 = 2 // incheswidth_2020 = scale_factor * width_2010width_2020 = 5.3014397266
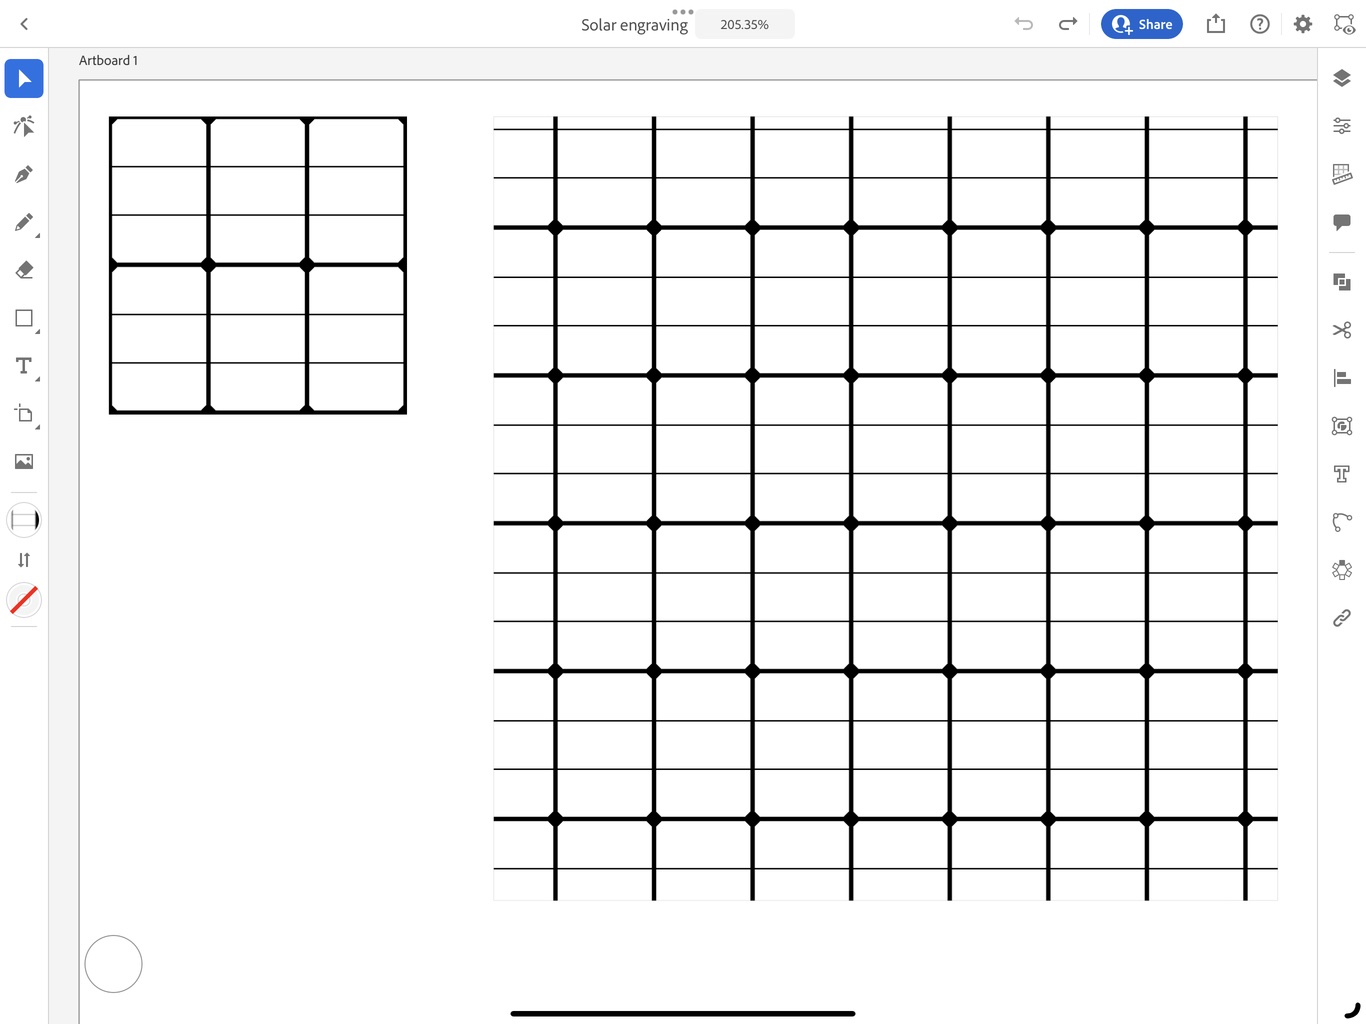
Then, I got to designing. I figured I could cut around the edges of the panel, then engrave the separator lines. Since I couldn’t find suitable texture patterns online, I used Illustrator’s maddening Pattern tool to design my own. The math for making a precisely-square pattern with 6 blocks with equal dividers in between, plus the notched edges, took several hours to dial in, but I’m happy with the simple appearance.
To make my first cuts, I used cardboard. The larger board took about 15 minutes to engrave and cut, but I was thrilled with the results:
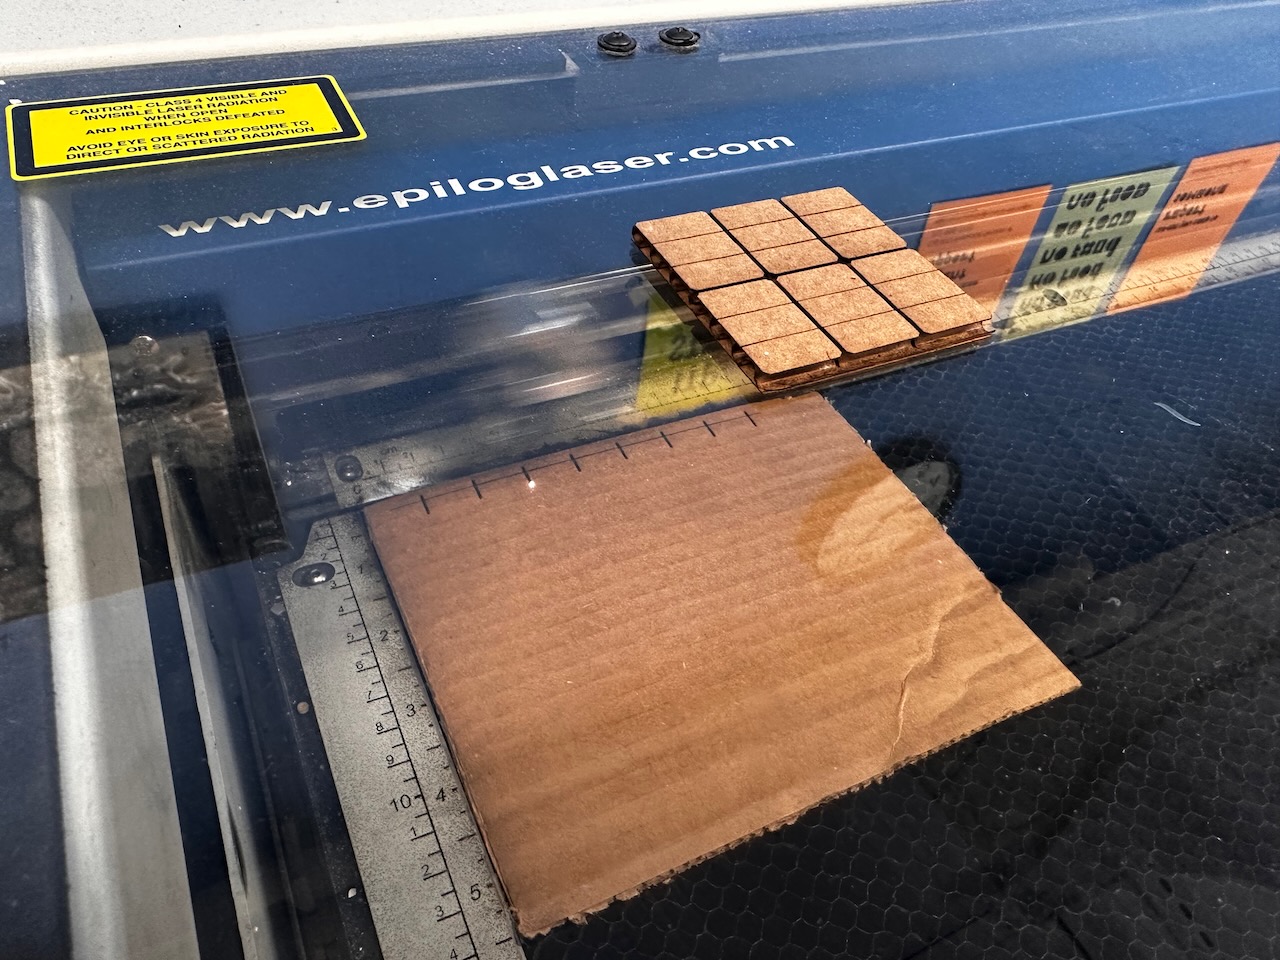
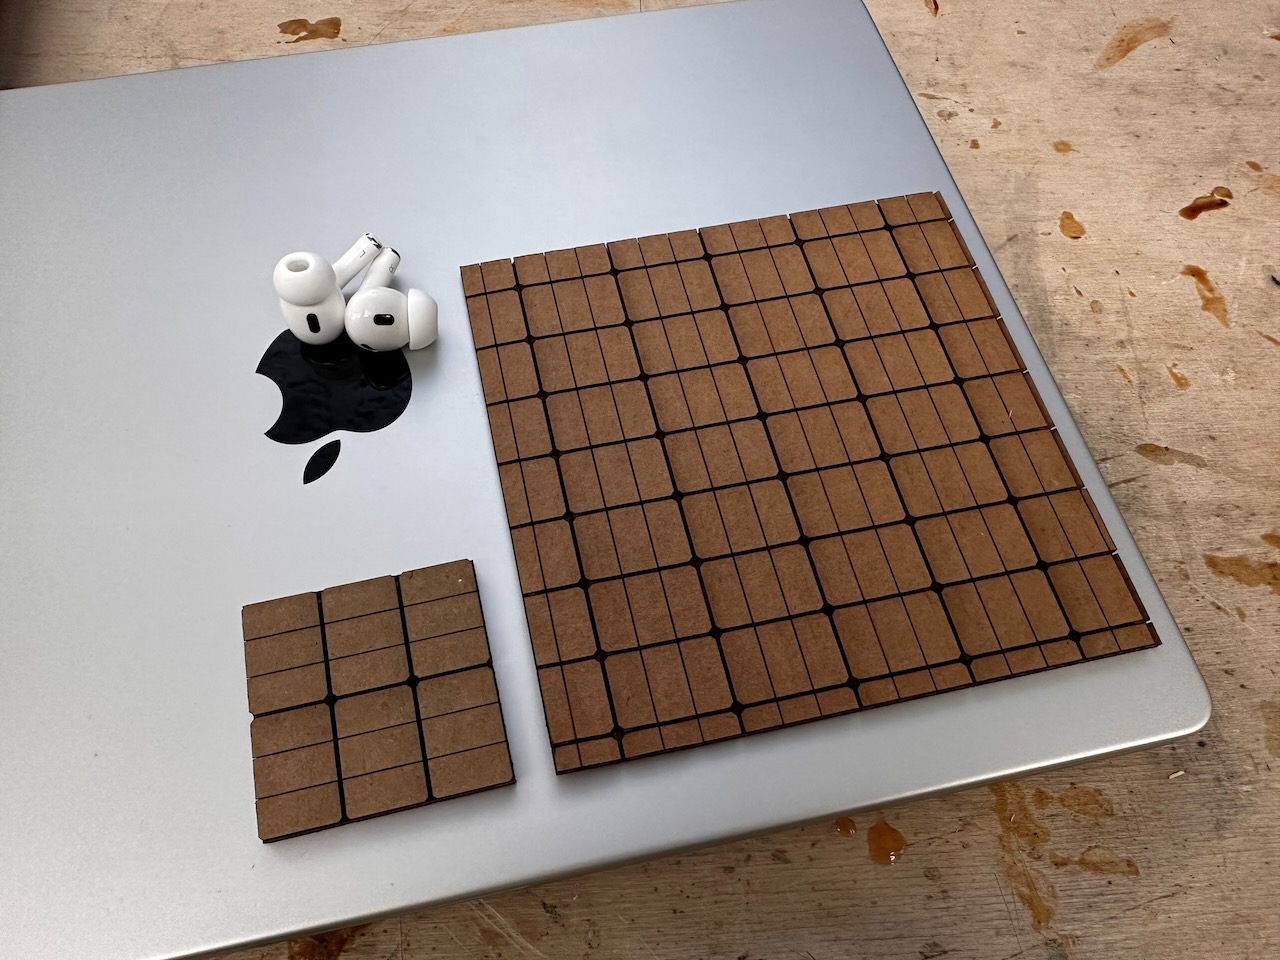
The smaller panel could output 5W, or enough energy for LED string lights, a radio, or charging an iPhone slowly. This larger panel could output 35W, or enough energy for a humidifier, a 19” color TV, or charging a MacBook. (Source)
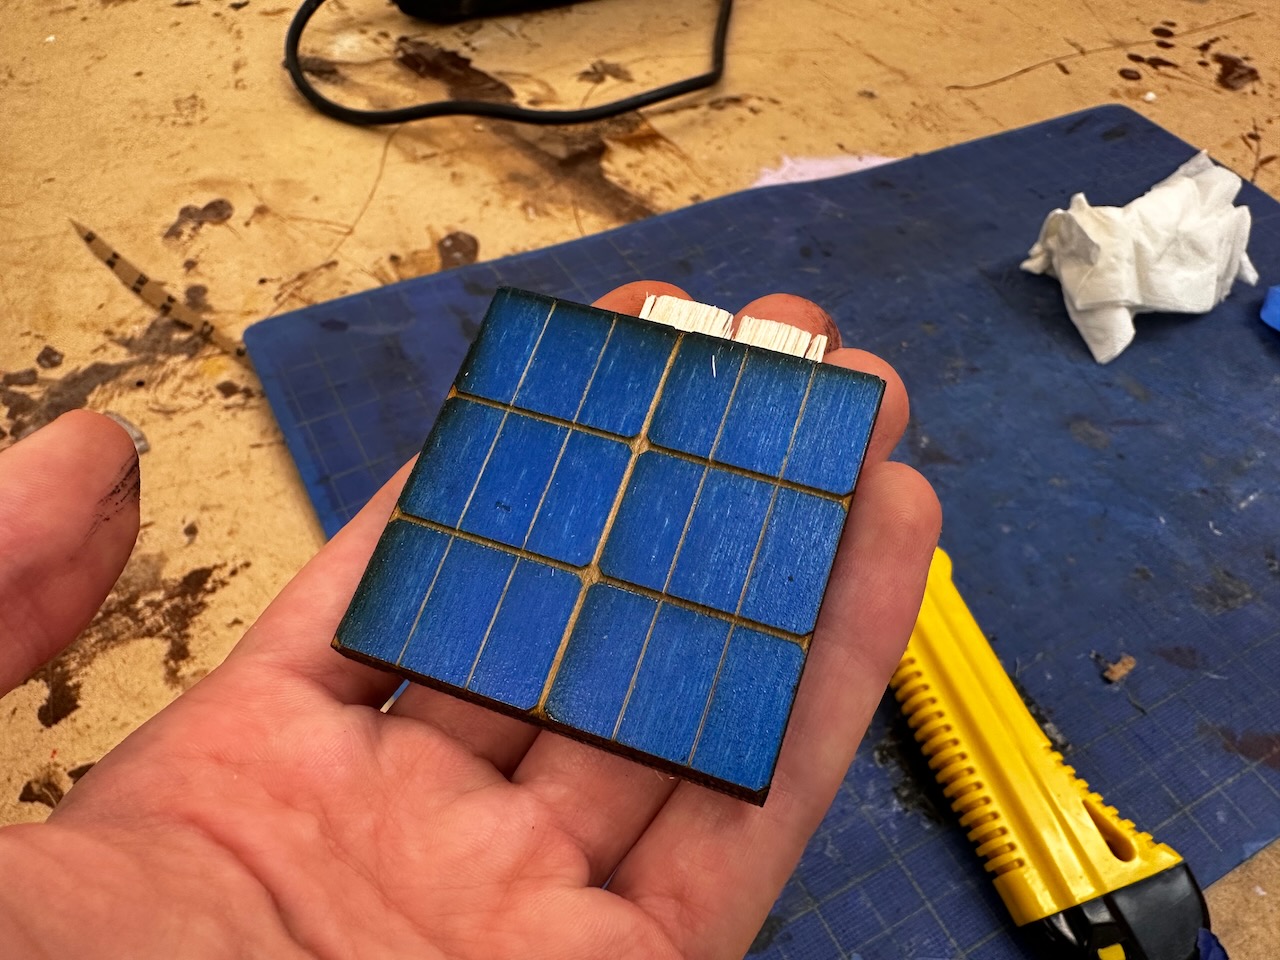
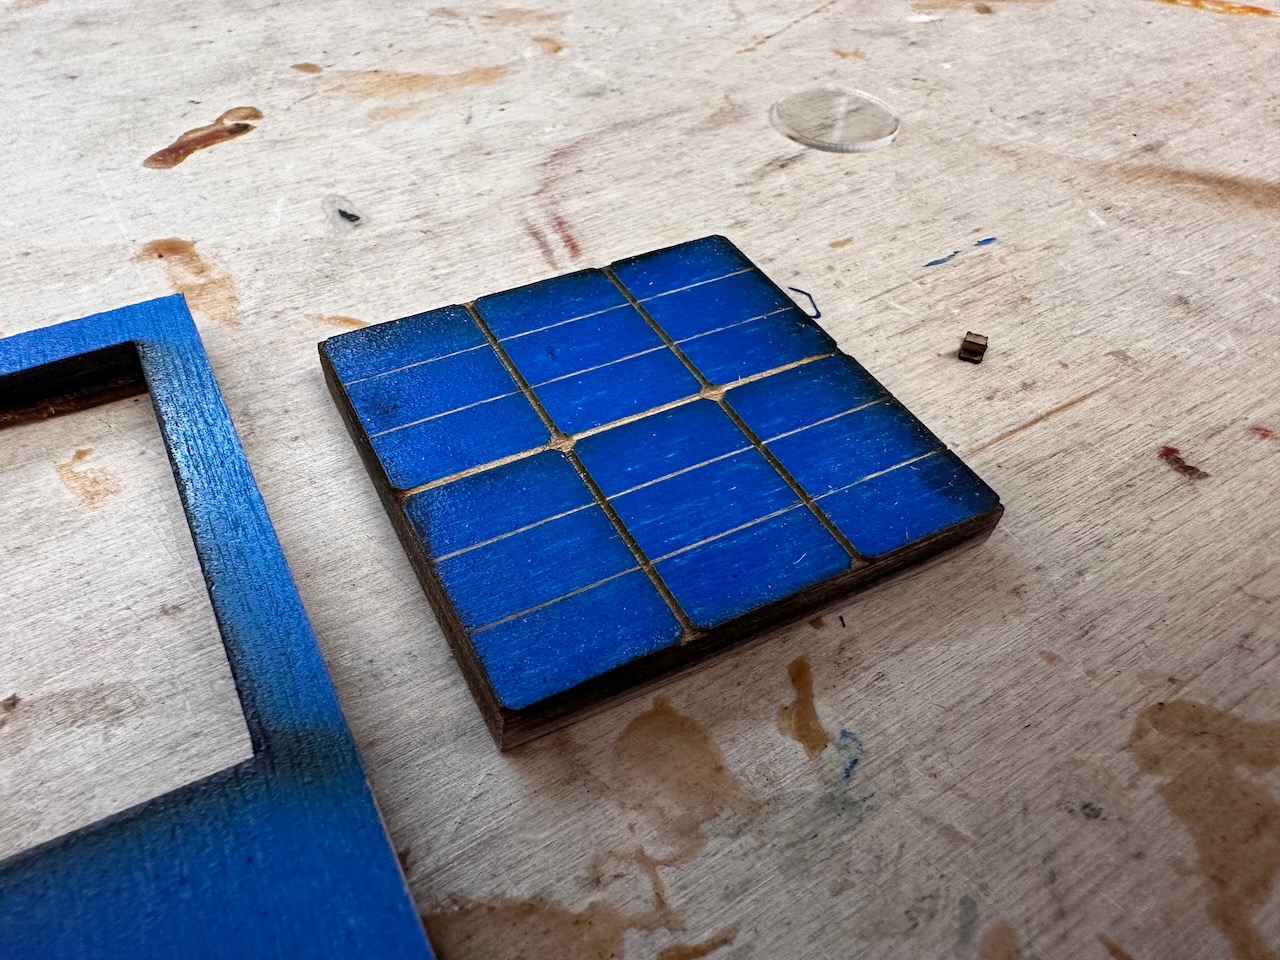
Cardboard, however, doesn’t look like PV panels. I discussed with my Physical Computing professor Yeseul, and consulted Luke, and decided to try painting wood, then engraving off the paint for the dividing lines. I found suitable scrap wood for the small panel, used the spray-painting booth to paint the panel glossy dark blue, and let it dry for a few hours.
When it felt dry to the touch, I brought the painted panel to the laser cutter. Shop staff directed me to follow the posted guidance for the engraving and cutting first (40s 100p 500f), then for the cutting, do a second pass with 90s 20p. This was insufficient, unfortunately, requiring three more passes before cutting only mostway through the wood. These extra passes singed the wood & the paint, discoloring the edges, and the paint wasn’t as dry as it appeared, making the edges slightly gummy. I got out the sandpaper block again, and cleaned up the edges, but didn’t love the look, so decided not to duplicate these efforts for the larger panel.
In the future, it’d be awesome to find metallic silver acrylic, paint it true navy, add a wider railing around the edges of the panels. For now, I’m thrilled to have added the laser cutter to my skill toolbox, and to have produced a physical accompaniment to my recent website on why solar power shows us an optimistic path to solving climate change.