Connecting Arduino to P5
Following setting up humidity & temperature sensors on the Arduino, I wanted to show the current temperature in my web browser, since without external hardware web browsers don’t have access to that information. (MacBooks have many thermometers across the system for monitoring their wellbeing & moderating the fans, but their readings are not available with browser APIs, partly for fingerprinting reasons.)
First, I modified the example Arduino code that came with the temperature sensor to only output the temperature, instead of both readings. I figured keeping it simple would work best to start.
Next, I set up p5.WebSerial, include matching the baudRate option.
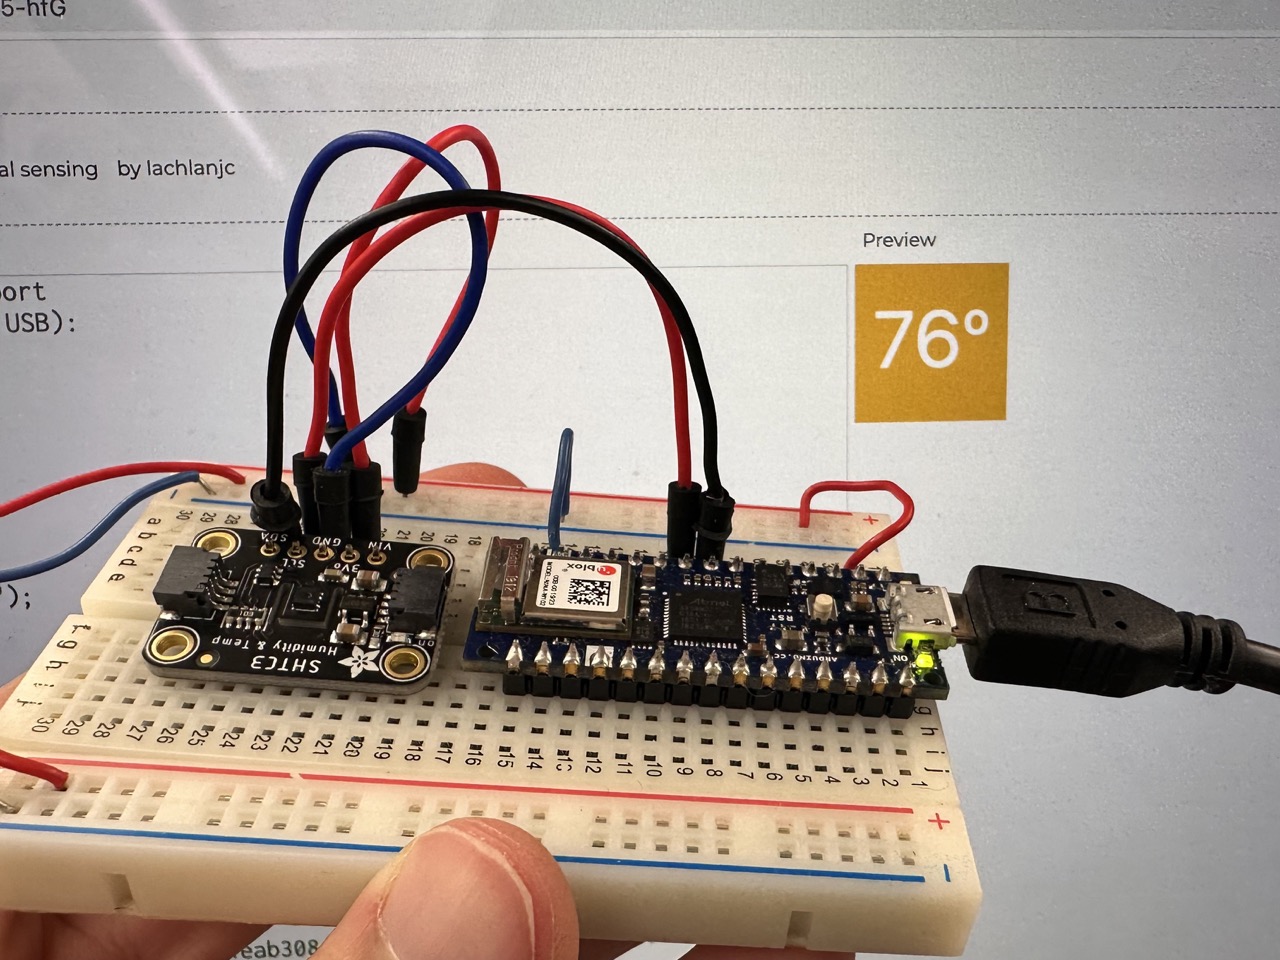
To show the temperature, I wanted to change the background color on a relative scale of room temperatures. I grabbed a few colors from Tailwind’s color palette, then popped them into a JS array. For the draw() function, I used p5’s map function from 75-85ºF (since 76ºF was the temperature of the room at present, & blowing on the sensor raised it a few degrees) to map to the indices of the COLORS array, set that to the background color, & drew the temperature centered above it.

const COLORS = "#ef4444 #f97316 #f59e0b #eab308 #06b6d4 #0ea5e9 #3b82f6 #6366f1".split(" ").reverse()function draw() {const colorIndex = Math.floor(map(inData, 65, 85, 0, COLORS.length, true))background(COLORS[colorIndex])fill(255)textSize(50)textFont('system-ui')textAlign(CENTER)text(`${inData}º`, 50, 65)}
Success! View the full p5 code here.
Final Arduino code (lightly adapted from example)
/*Take humidity and temperature readings with the SHTC3 using I2CBy: Owen LykeSparkFun ElectronicsDate: August 24 2018License: This code is public domain but you buy me a beer if you use this and we meet someday (Beerware license).Example1_BasicReadingsTo connect the sensor to an Arduino:This library supports the sensor using the I2C protocolOn Qwiic enabled boards simply connnect the sensor with a Qwiic cable and it is set to goOn non-qwiic boards you will need to connect 4 wires between the sensor and the host board(Arduino pin) = (Display pin)SCL = SCL on display carrierSDA = SDAGND = GND3.3V = 3.3V*/#include "SparkFun_SHTC3.h" // Click here to get the library: http://librarymanager/All#SparkFun_SHTC3SHTC3 mySHTC3; // Declare an instance of the SHTC3 classvoid setup() {Serial.begin(115200); // Begin Serialwhile(Serial == false){}; // Wait for the serial connection to start upSerial.println("SHTC3 Example 1 - Basic Readings"); // TitleWire.begin();Serial.print("Beginning sensor. Result = "); // Most SHTC3 functions return a variable of the type "SHTC3_Status_TypeDef" to indicate the status of their executionerrorDecoder(mySHTC3.begin()); // To start the sensor you must call "begin()", the default settings use Wire (default Arduino I2C port)// Serial.println();Serial.println("\n\n");// Serial.println("Waiting for 5 seconds so you can read this info ^^^");delay(5000); // Give time to read the welcome message and device ID.}void loop() {SHTC3_Status_TypeDef result = mySHTC3.update(); // Call "update()" to command a measurement, wait for measurement to complete, and update the RH and T members of the objectprintInfo(); // This function is used to print a nice little line of info to the serial portdelay(190); // Delay for the data rate you want - note that measurements take ~10 ms so the fastest data rate is 100 Hz (when no delay is used)}///////////////////////// Utility Functions /////////////////////////void printInfo(){if (mySHTC3.lastStatus == SHTC3_Status_Nominal) {// Serial.print(mySHTC3.toPercent());Serial.println(mySHTC3.toDegF());} else {Serial.print("Update failed, error: ");errorDecoder(mySHTC3.lastStatus);Serial.println();}}void errorDecoder(SHTC3_Status_TypeDef message){switch(message){case SHTC3_Status_Nominal : Serial.print("Nominal"); Serial.print("Nominal"); break;case SHTC3_Status_Error : Serial.print("Error"); break;case SHTC3_Status_CRC_Fail : Serial.print("CRC Fail"); break;default : Serial.print("Unknown return code"); break;}}