Week 2 – Wearable Switch Project
Group members: Kline Gareth, Sophie Ana, Lachlan Campbell
The three of us came into building a switch with little experience in wiring, schematics, conductivity, or wearables. Nonetheless, from the start we established a stretch goal of building our switch into a jacket, (slightly) illuminating your pathway ahead once you zip up the jacket.
We started out using a breadboard, Arduino (without software) as a power supply, & simple wires to get the basic circuit working, modeled after the example wiring from class.
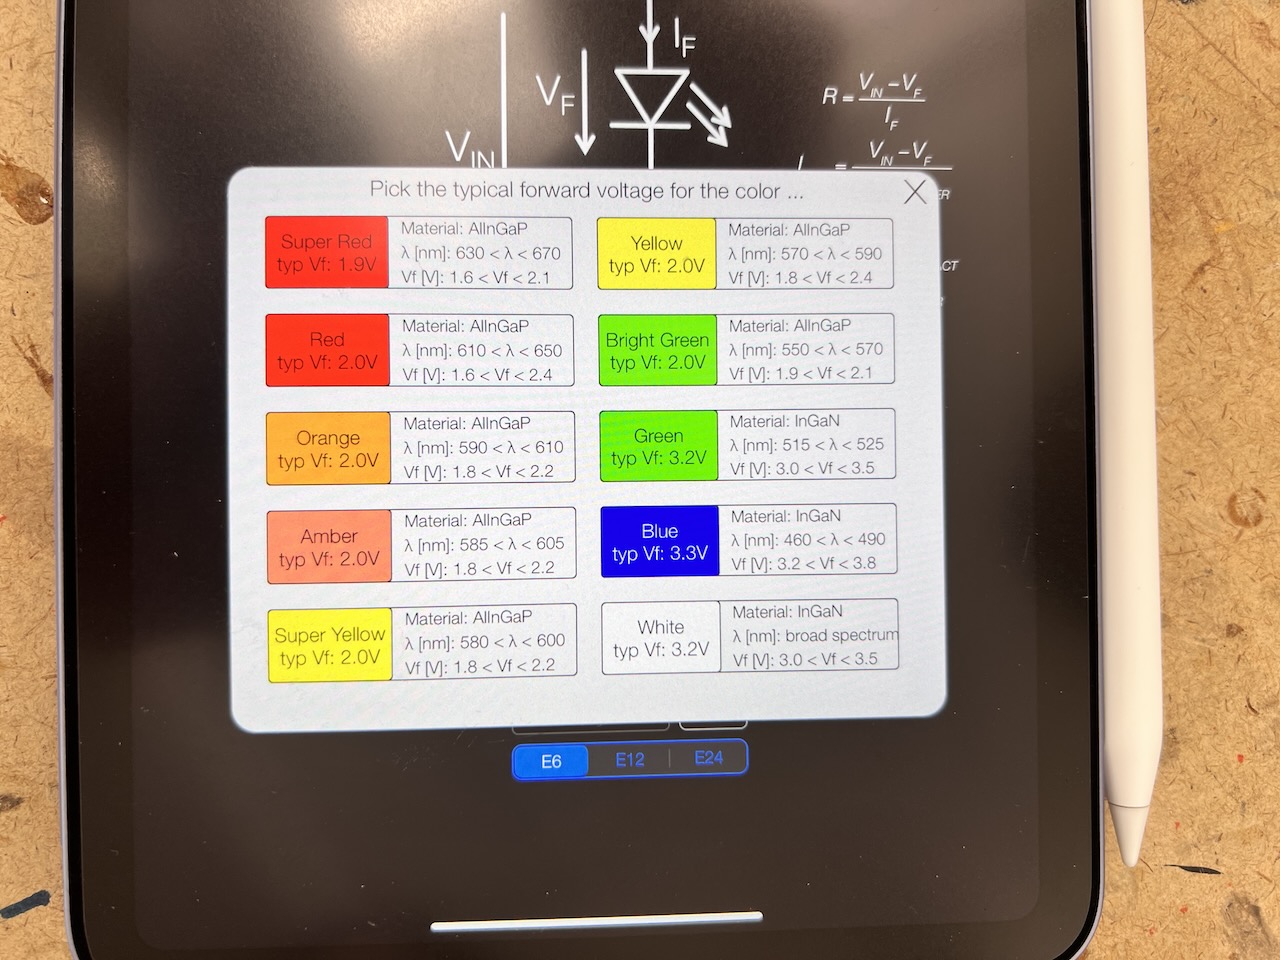
Initially, this included a resistor in the circuit since we assumed we needed one. Yet the LED was illuminating so faintly we all thought our circuit was mis-wired & didn’t work at all. Sophie Ana suggested the issue was purely voltage; the Arduino tech specs revealed the pin we were using provided 3.3V of output, then Kline checked an iPad circuitry app (EE ToolKit) to find the voltage requirements. We found that voltage was perfect for a white LED without any transformation:
Removing the resistor, the LED illuminated seamlessly:
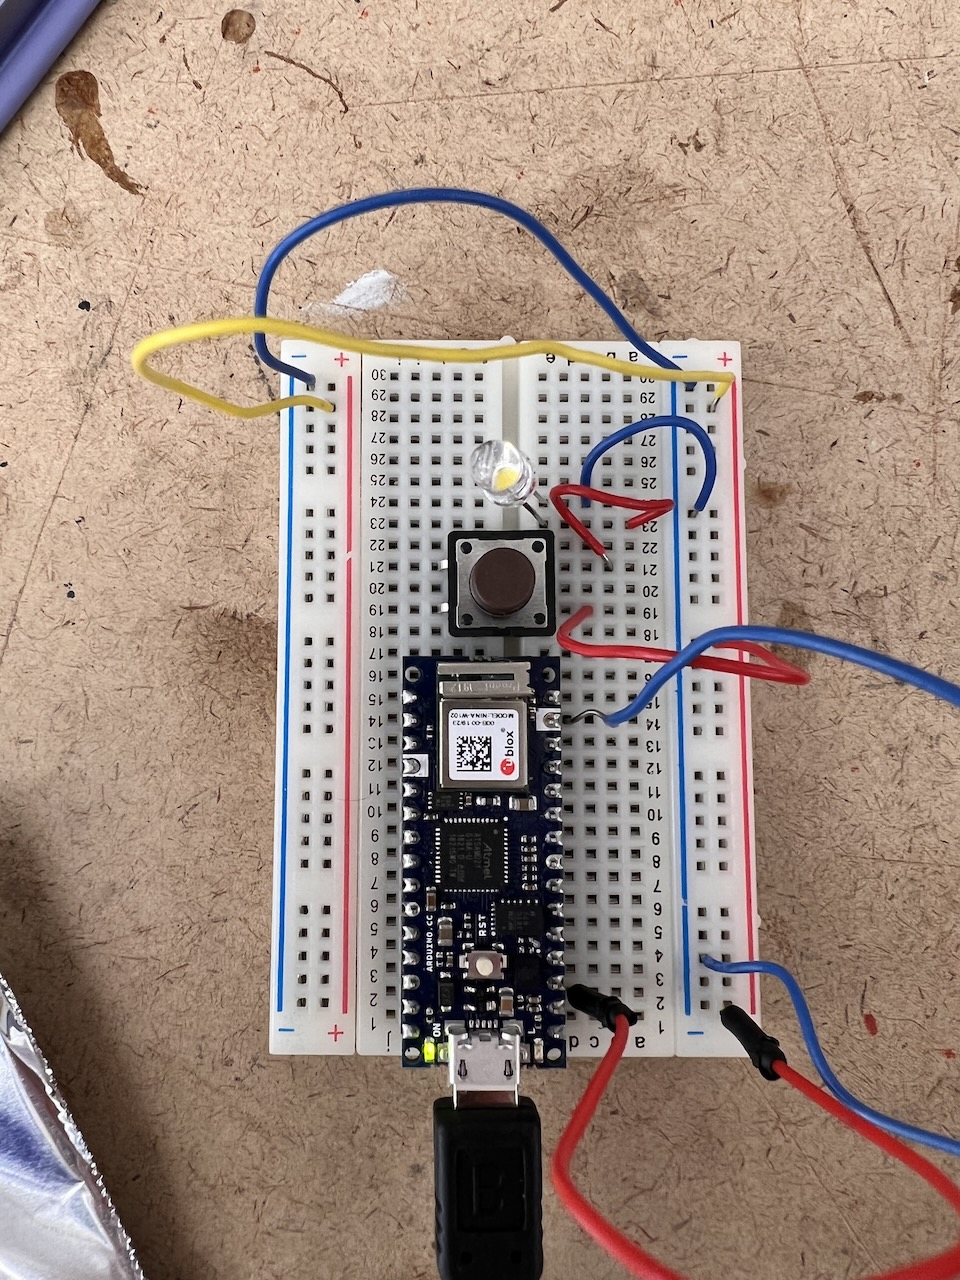
Breadboards are great for quick prototyping, but feel contrived as finished projects. Returning to our stretch goal of producing a wearable project, we put the project into the inside pockets in a jacket of Kline’s.
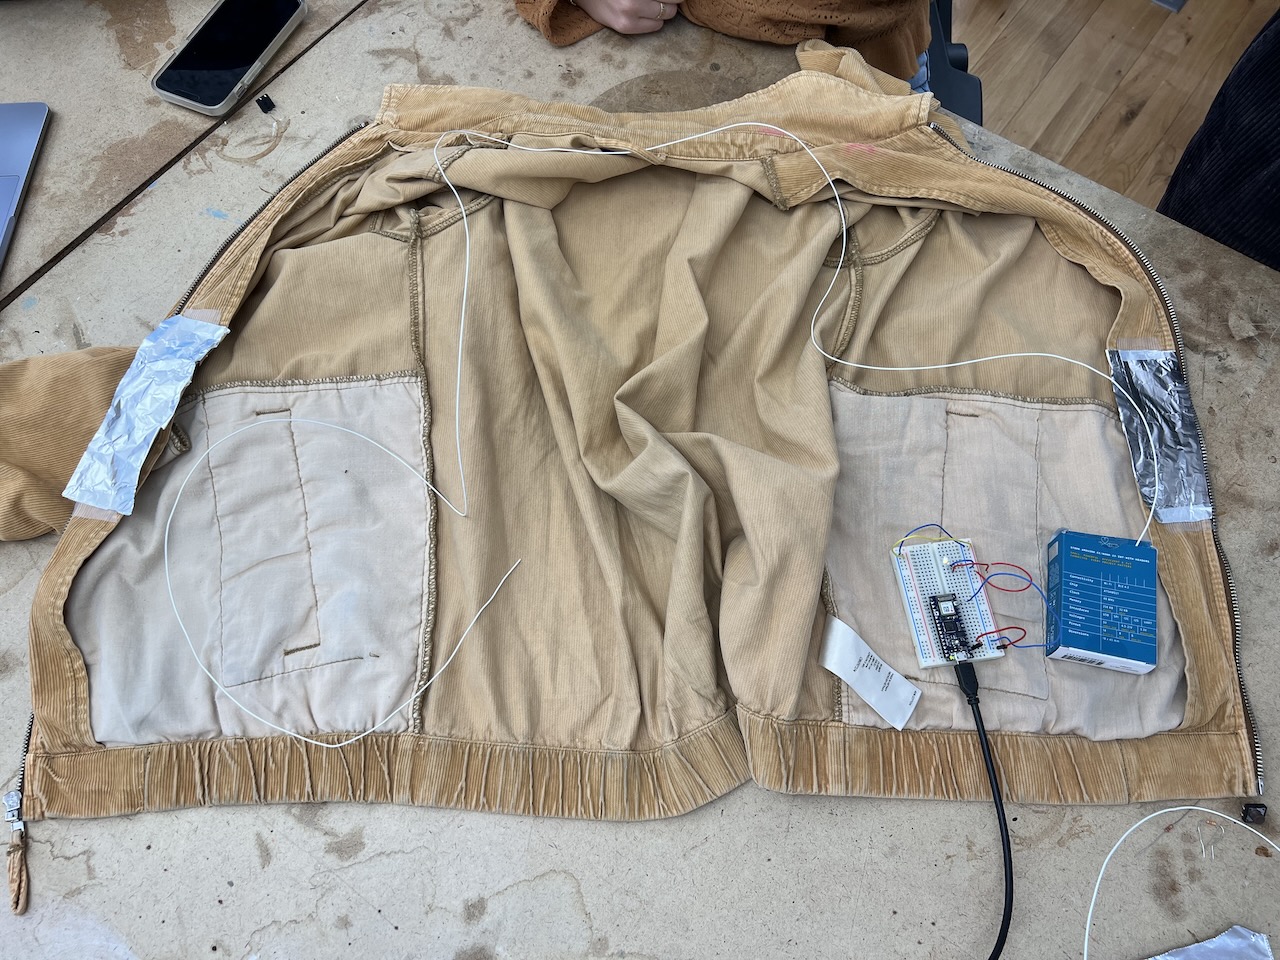
Hoping to get the LED to illuminate when the jacket is zipped up, I suggested aluminum foil contacts on the liner, & scavenged aluminum foil from the IMA kitchen to tape rudimentary contacts into the inside of the jacket. With much longer wires & Scotch tape, we had the basic functionality working inside the jacket:
Kline’s childhood circuit experience paid off, informing the group we could simplify the wiring, which she did:

When I put on the jacket at this point, it felt fragile all around—the short power cable connected to an outlet restrained my movement, the wiring felt easy to snag, the contacts easy to damage or fall out. The power cable we plan to remedy by switching to a portable charger inside the jacket pocket, allowing wearing the jacket anywhere. The wires around the back proved more difficult, but we found adhesive, conductive fabric wiring in the Soft Lab on the IMA floor, & replaced the wire from one contact to the LED with it:

Finally, putting on the jacket again, the LED lit up most of the time! Watch the collar :)
If I were to continue this project, a few things spring to mind:
- Removing the breadboard would make the system lighter-weight, & it’s not needed for a circuit this simple
- Making the LED much brighter, or better yet, turning it into a strip of LEDs, would make this a genuinely safety-improving device
- Laser-cutting or 3D-printing a crown structure, with a full strip of LEDs, would lean away from the safety angle but look rad. Could be lit in a rainbow for extra fun.
- The contacts are not the most reliable solution; embedding the conductivity directly into the zipper would provide more consistent signal output, & debouncing output in software or on the circuit to prevent flickering if connectivity breaks for short bursts would make it feel more professional